Enabling Legacy setting in BIOS
- Power on the PC and wait for the PC manufacturer Logo to display.
- Immediately start tapping the Hot key/keys (F12, F2, F8, F12, Del etc.) multiple time depending on the manufacture to enter the BIOS setup. The hot keys get displayed on the screen as shown in the screen shot below. You can also find the hot keys for popular models in the Annexure of this document.

- In case, the PC/laptop boots to the regular operating system, please reboot the system and try once again.
- After successfully entering the BIOS menu, depending on the make and model of the PC/laptop the user has to look for any of the following option (buttons).
- Legacy Support (On/Off or Enabled/Disabled)
- Boot Device Control
- Legacy CSM (On/Off or Enabled/Disabled)
- Launch CSM (On/Off or Enabled/Disabled)
- CSM (On/Off or Enabled/Disabled)
- UEFI/Legacy Boot (Both/Legacy Only/UEFI Only)
- Boot Mode (Legacy Support)
- Boot Option Filter (UEFI and Legacy/UEFI First/Legacy First/Legacy Only/UEFI Only)
- UEFI/Legacy Boot Priority (UEFI First/Legacy First/Legacy Only/UEFI Only)
Below is an example:
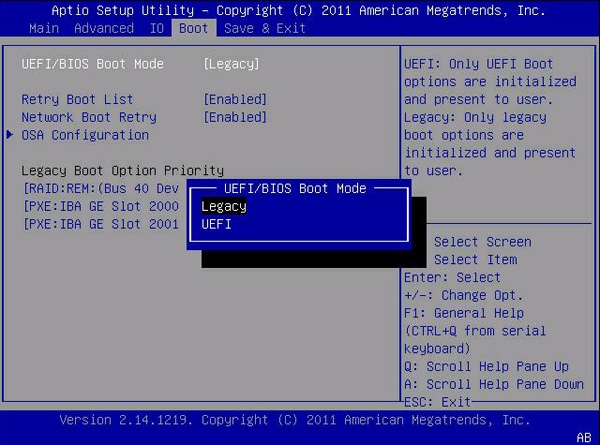
- Enable the options which are shown in bold above. Eg: On, Enabled UEFIFIRST, Both etc.
Note: In case if any of the above options are unavailable, please contact Ensurity immediately on thinc.support@ensurity.com and provide the details such as PC/Laptop Manufacturer name and model number.
- Once the Legacy boot option is enabled in the BIOS setup, save the changes and exit.
- The exact steps depend on the PCs make and model, however in general the user can navigating to the “Exit” tab using the Left (←) and Right (→) arrow keys. In the Exit tab one of option will be “save changes and exit”. Choose the "Save changes and exit" option. Or in most of the PC/Laptops the keyboard shortcut F10 is often synonymous with “save and exit” however the user needs make sure that they are using the correct hot key or shortcut key.
- After exiting the BIOS setup, the PC/laptop will reboot.